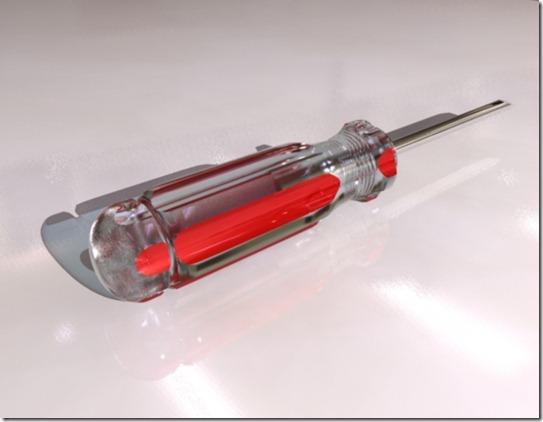
Here is a simple screwdriver project to introduce you to some entry level Mental Ray skills and features, as well as a few basic curve-based model techniques.
- Final Gathering
- Global illumination
- HDRI (High dynamic ranged imagery)
MAKE CURVE
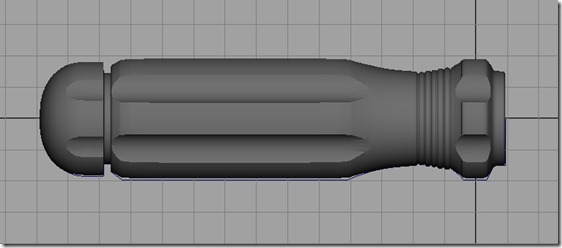
Create a very similar curve. Then revolve it. Details in lecture. Create all the sections of the curve individually and then combine them.
*Anytime you create a straight line, hold the the shift button to snap it. It is the same in more drawing programs.
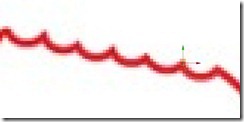
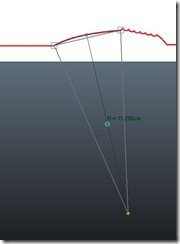
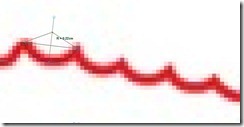
Using the insert key, move the pivot point to the end of the curve. Then Duplicate the curve and move it to the end of the last. Now rote it so that it fits the best it can. Repeat until all are placed.


My curve pivot point was off, so I snapped it to the end of the curve.
Your curve still has history, so select it and choose Edit > Delete by Type > History.
REVOLVE HANDLE
These are the settings I used to revolve the curve.
BOOLEAN HANDLE
Make a cylinder with 20 or so Axis divisions and 8 or so Height Divisions. We are going to use this for carving out, Boolean procedure, the notches in the handle. Scale and move as shown below. Make sure you do not move it past the trim work you created.
Smooth the cylinder and the handle to be get a better cut with the boolean.
To get the cylinder to revolve around the handle, you have to move the pivot point. The fastest way is to group it then duplicate the group. Another way is to hit the {insert} key and move it manually.
Now we are going to duplicate the cylinder 5 more times every 60 degrees. Edit>Duplicate Special □
Use the following settings:
Combine the cylinders in to one object. Select all the cylinders choose, Mesh>Combine.
Boolean the cylinders from the handle to notch it out. Mesh>Boolean>Difference It should look something like this:
MAKING THE SHAFT
Make a default cylinder, scale it and rotate in place. To chisel the tip, create a cube and increase the division. I used 6 divisions. We are going to perform another Boolean operation, so place it above the tip appropriately. We now want to mirror the cube. The fastest way to do this is to group the cube {CTRL} + {g} or Edit>Group, which changes the pivot point at the origin (0,0,0). Now just duplicate it and then in the Chanel Box change the Scale Y to –1; this mirrors the cube. The last this is to select both cubes and combined them. Mesh>Combine
Now it is ready to boolean the shaft. Select the shaft then the cubes and then Mesh>Boolean>Difference
After making the initial geometry lets start assigning the materials. We are going to make a typical transparent and painted handle most likely made of PVC. Now there are a number of material that can be used, but we are only going to look at one for the moment, the MIA material.
Now select the shank and choose Assign new material>MIA Material. *We will talk about why later. Then select Presets and choose Chrome > Replace.
Right click on on the handle and choose Assign new material>MIA Material. *We will talk about why later. Then select Presets and choose Glass Physical > Replace.
For the ground we are going to assign Blin to give it a little reflection, Assign new material>Blin. Then change the color swatch to white.
RENDERING
Before I start rendering, I always make a new camera, then I have a dedicated camera for rendering and a perspective window for working in. Create>Cameras>Camera. At this point, I label my camera “Render Me” to keep myself organized and make sure I render the right camera. Then choose a Panel Window like the side, front, or top that you might not be using and look that new camera. In that panel under the Panel Menu with the new camera still selected, chose Pannels>Look Through Selected Now you are looking through the new camera. There is one more thing I like to add, a resolution gate, so I know exactly what I will see when I render the scene.
Change renderer to Mental Ray
GENERAL MENTAL RAY TIPS
These are some tips on using Mental Ray.
- make sure your models are UV mapped before you render. Even if it's just a quick automatic mapping, this can prevent some errors.
- keep your geometry quad or tri.
- avoid using ambiance lights; especially with Final Gather.
Render.
Change Quality Presets to Production
It doesn’t look like much yet, but like I always say, ‘what does a chrome ball look like in a black room?’ We need some kind of environment to get those reflections.
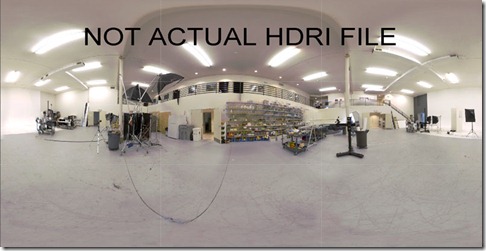
Window>Render Editors>Render Settings Then choose the Indirect Lighting tab, under the Environment section press Create next to Image Based Lighting. Navigate to a good indoor HDRI image. Not all HDRI images are created equal; try a few different HDRIs. Insert why here.
It is starting to look a little more realistic.
*Turn off Default Lighting. Note: Default lighting is used until you add a new light. This can mess you up a bit if you are unaware of it.
So lets add a new spot light to add some depth. Add a Key light with Ray Traced shadows. The best way I have found to position the light is to look through it. Select light and then choose a Panel Window like the side, front, or top that you might not be using and look that new camera. In that panel under the Panel Menu with the new light still selected, chose Pannels>Look Through Selected Now you are looking through the new light.
It is looking good, but the tabletop is a bit too reflective. There are a bunch of ways to approach this, I chose to give the surface a texture to defuse the reflection. I added a rock bump map. Why?
Light Settings:
To allow the light / shadows to
- shadow trace depth (note this must be set on the light (defaults to 1) as well as in the mental ray render globals (defaults to 2))
- "Low" area light samples (defaults to 2x2) and the "High Sample Limit". However the "High Sample Limit" defaults to 0, which turns OFF the "low area light sampling" mode. This is "good" quality wise (you never actually get the "low area sampling") it precludes a particular mia_material(_x) optimization (it tries to control this from the material, driven by importance, but it cannot do so if it is set to 0). I suggest you turn it up to 4. You can generally keep your "low" sampling at 2x2 when you are using the mia_material, but when using other materials, this may be something to watch out for, since they will strictly adhere to the "depth" setting rather than the relative ray importance, like mia_material(_x) does it.
Check here for a more details overview of Trace Depth.
With out increasing the Trace Depth
Increasing the Trace Depth to 3 . . .
Turn on Final Gathering and Global Illumination
A quick initial setup to see how it looks with a fast render.

I had to change the Primary diffuse Scale and lowered it to about 50%.
controls the overall strenght of the final gather result. If Value is 1 means that 100 percent of the final gather result is used. If value is 0.5 means that maya will only use the half of final gather, resulting in a darker image. This doesn't require additional calculations.
Secondary diffuse scale
only affects the intensity of bounced lights, if you feel like there is too much color bleeding and too bright shadow areas due to the light bounce you can decrease this value for bring in some contrast into the image.
Let’s now increase the general ray depths (Fig. 11) and the Final Gathering ray depths (Fig. 12). We’re also turning the Secondary Diffuse Bounces on. However, the Secondary Bounces button in the Render Globals only sets their Bounce Depth to 1; we want it to bounce twice so we’re selecting the actual node where all the mental ray settings are stored, which is called “miDefaultOptions”.
Under Quality Tab
Under Indirect Lighting Tab
Fig. 11
from 1, 1, 2
If you are rendering the same scene over and over again, turn Final Gather Map Rebuild to Off. It will speed up your render.

Accuracy -
Point density -
Point interpolation -
Scale -
Rebuild -
Change Final Gather Tracing: Refractions to 2 or 3
Sampling Mode> Custom Levels
min sample level 1
max sample level 3
RAYTRACING SECTION, move all the sliders up to 10 except the shadow trace depth attribute
FINAL GATHER SECTION, check final gather, final gather rays Accuracy
Now let's explain some attributes. Roll down to the Final Gather tag in the Mental Ray tab to see the Final Gather attributes.
Accuracy - If you set this low, like 20, your model will look like it is blurry and will also have spots. When rendering a scene, don't go lower than 100.
Point density - This is the density of Final Gather points it'll render. The more points you have, the closer packed they'll be, providing a cleaner light.
Point interpolation - Be careful with this attribute. Most of the time, leaving it at default setting will work just fine. The more you increase this value, the more smoothed out the rendering will get. But you will lose some detail.
Scale - Basically this allows you to adjust just how much light Final Gather adds to a scene. If you're using Final Gather with an HDRI (not covered in this tutorial), you'll definitely have to make this value darker because there would be to much light in the scene.
Rebuild - When this is set to on, Maya generates new Final Gather points every time you render. When this is off, Maya will refer back to it's last Final Gather points file. When it's set to freeze it prevents new date to be written to the previously made Final Gather file.
Accuracy
- Indicates how much rays are used during rendering. A higher value improves the result because the indirect lighting will be better defined. Higher values mean higher rendering time and also the memory requirement will increase. Start testing with low values.
Value: Test render: 20 Final render for 'simple' light setups: 20 - 60 (eg: exterior scenes) Final render for 'complex' light setups: 60 - 500 (eg: interior scenes or exterior night/evening scenes; really depends on your scene, other FG settings and the available light sources)
apply these settings:
- ______________________________________________________________
- Point Density
- Mental Ray will heuristically determine the points for which Final Gather calculations are necessary. To achieve higher overall quality, increase this number.
Value: Test render: 0.4 - 0.6 Final render: 0.8 - 1 (only increase above 1 - but always below 2 - if really necessary)
______________________________________________________________
Point Interpolation – 60
______________________________________________________________
Point Interpolation
- Mental Ray can do some interpolation to achieve nice and smooth results without too much (expensive) Final Gather calculations. Increase this number to smoothen your render. It's not as accurate as increasing your Accuracy, but much, much faster. This setting determines the number of Final Gather points that should be considered for interpolation.
Value:
Test render: same as accuracy value - three times the accuracy value (20 - 60) Final render: 1/5th of accuracy value for accurate renders (with a min of 10) Final render: same as accuracy for quick smooth renders (with a max of 150)
______________________________________________________________
- Filter
- This setting will determine how much of the white spots will be filtered out which are caused by reflective materials. These spots are easy to recognize. If they occur use this setting. If you increase the setting less spots will be visible. Only use this setting if it is necessary. Values higher than 2 are rarely used.
Using the Filter option is known to cause problems in low-light scenes, i.e.: your scene renders almost completely black, because the few bright spots FG finds, are removed in the filtering process. The only solution in these cases is to increase the FG Point density and accuracy.
Make sure the mapping is on angular, and that you find where you saved your HDRI map
---------------------------------------------------------
Optional DoF
---------------------------------------------------------
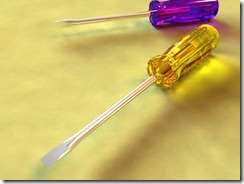
for DoF you're going to need an extra screw-driver, a bit further away from this one. And perhaps a different color handle. I chose a blue-ish purple color
Ok, once you've duplicated your screwdriver and moved/modified it, select the screwdriver you want your camera to be focused on and go to display>heads up display>object details. Now on your new HUD, find it's distance from the camera and either write it down in note pad and copy it, or remember it. Now select the ground plane, and hit the right arrow key until you come upon the perspective camera (perspshape) scroll down to the mental ray tab on it, and click the little box by the attribute "Lens shader" scroll down and find the lenses in the pop up, and select "physical_lense" now on the attribute "plane" type the number the distance of the camera is, and put a - infront of it, (this will work in most cases, if not, put a +) now render!
Hope you had fun!
Some errors happend and two images wouldn't show up, I don't know if this link will work but to see the tutorial in it's origonal state go to http://micah.noobgrinder.com/screwdrivertut/ And also visit my dA http://www.micah.noobgrinder.com http://thunor.deviantart.com










No comments:
Post a Comment