- Lets first start by creating a project folder.
- INTIAL SETUP
- Start a new project. File > Project > Create > New . . .
Name project Lightsaber, set location to desktop or your personal drive, choose Use Defaults and then Accept.
Now we have to assign or ‘Set’ the project to our file. File > Project > Set and then browse to find the folder you just created.
Importing the reference image plane
To simplify this lesson, I provided a blueprint that I laid out from reference images and existing blueprints. First we have to bring import the main reference image or blueprint.
If you just opened Maya, you are probably in the perspective window by default; tap the {Space bar} and it will switch to the four panel view. Move your mouse over the front view and tap {Space bar} to open just a single front view. The space bar allows you to toggle between single and multi-view and this works with any window type. If you hold space bar longer, it will also bring up the marking menu; we will talk about that later.
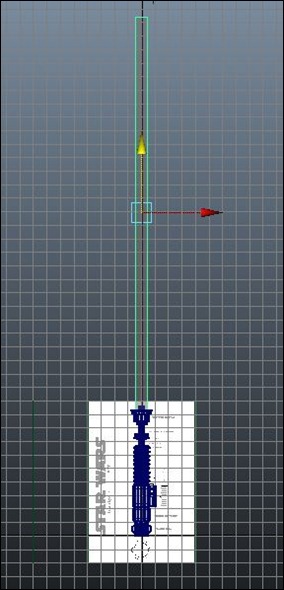
In the front Panel View Menu, go to View > Image Plane > Import Image browse and find the Light Saber blueprint.

The blueprint image was pre-centered horizontally, but we have to move it vertically in the Y direction. Select the image plane attributes and then switch to the Channel Box, highlight the words Center Y and with the middle mouse button depressed drag the mouse left and right until the bottom of the saber sets on 0 on the grid. I zoomed in really close for accuracy and then ended up using 9.99 for the Center Y position. Yours might be different, the key is to zoom in really close.

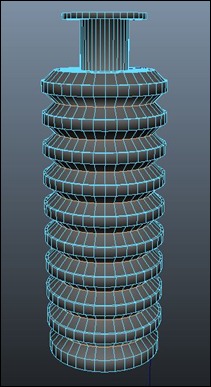
I divided the Lightsaber into seven sections and each section we will model separately. I have a modeling rule of thumb, if it is separate in the real world model it separately. This is just a general rule, but it keeps the geometry cleaner and can solve a lot of modeling issues.
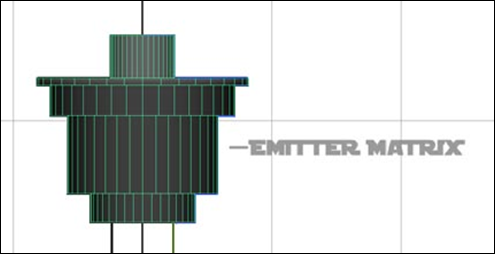
Emitter Matrix. Trace the right side of the Lightsaber's Emitter Matrix with the EP Curve Tool then we will revolve the curve to create the Emitter Matrix. From the main menu, choose the EP tool’s option box Create > EP Tool . Change the curve Degree to 1 Linear. This allows you to create straight angular lines.
 In the Revolve Options, change the following settings. Change the number of divisions to 36, this will produce a fairly smooth revolve. I used 36 because we will extrude six nubs at the base of the Lightsaber later and 36 is divisible by 6. We will be working entirely in Polygons for this project, switch Output Geometry to Polygons. Switch Tessellation Method to Control Points, this sets up the revolve to only create edges where you place vertices on your curve. Then press Apply to revolve.
 It should look something like this.
- Switch Offset Type: to Absolute, I prefer using Absolute because no matter how large or small a edge is, a beveled edge with a width of 0.02 will be the same size.
- Set the Segments to 2, setting it to 2 will keep the bevel tight after smoothing.
- Initially the width 0.02, this will change how wide or thick the bevel is.
Anytime you bevel an edge, history can be associated with it. Meaning, if you do not like how the bevel looks you can still change it after the fact.
Repeat for Lens Assembly (green)
Rrepeat for the Crystal Focusing Shaft (light Blue), but notice it doesn't end back at 0. 

Skip the Handgrip for now, we will work on that later.
Also repeat for the Crystal Focusing Shaft (Blue), but notice it doesn't end back at 0.

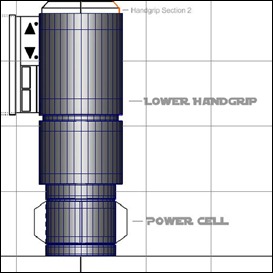
Hand grip:
When you draw the initial curve, make sure the lower vertex on the curve is placed just below the lower black line of the first section.

 If it does not line up, combine all sections of the handle. Mesh > Combine Switch to vertex mode, select all vertices, and then merge them – Edit Mesh > Merge. Then scale the handle in the Y-Direction until it fits the blueprint. You might have to move it a bit and then rescale it a few times until it fits. * I ended up moving it up in the Y-Direction 0.036 units and scaling it in the Y-Direction by 0.995. Yours should be a bit different.
Beveling the handle:
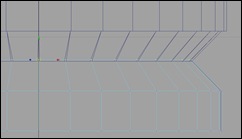
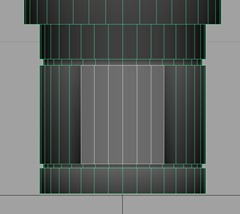
When beveling the handle or anything for that matter, always check your reference image to see what it actually looks like. With that said, majority of the edges are micro bevels (small) except for the edges between each section. Those bevels are much larger.
I selected the edges that need to be a bit larger here.
The Nubs:
The nubs can be a bit tricky so read them carefully.
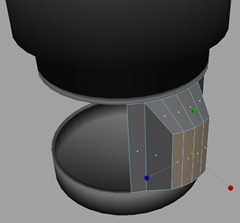
In the side view select six center most faces and then extract them. Mesh > Extract .
Select the lower handgrip minus the newly extracted piece and switch to Face Mode. Delete them.
Select the center 4 faces and then Extrude them out. C
Switch the Front View and pull the manipulator out to fit the image below.

Scale them in the Y-Direction to fit the image below.
Select the top 4 faces and switch to the Scale Tool. Scale the faces only in the Z-Direction until it creates a tapered nub, making it a bit more narrow. And slightly in the X direction to soften the curve. Essentially, you are flattening the nub a bit, but not completely.
Now we are going to Duplicate the nub a few times. In Object mode, select the nub. Choose Duplicate Special and change the following.
Rotate Y: 60
Number of copies: 5

Select all the parts in the Lower Hand Grip and combined them. Mesh > Combined
Switch to Vertex Mode and Merge.

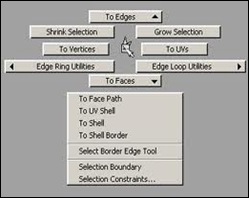
For the nub, we have to bevel all the main edges at the same time. First we have to select the two main perimeter edges. Since the main the edge is not an obvious loop, you can’t select it by double clicking on it. But if you select 1 edge you can select the edge loop by choosing Select > Select Contiguous Edges. Then while depressing the <shift> key repeat for the lower edge. And then while still depressing the <shift> key, select all the main corner edges for all the nubs.
Bevel all the rest of the Horizontal edges.
 |  |
It should look something like this . . .
PART 1: We will break this up into 2 parts, the first part is to align the image planes.
Control Box:
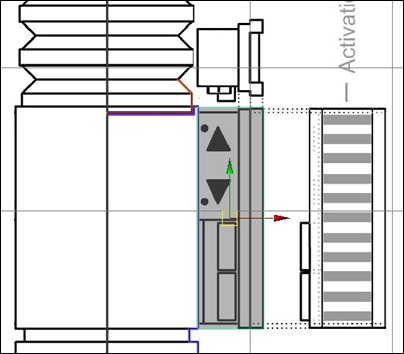
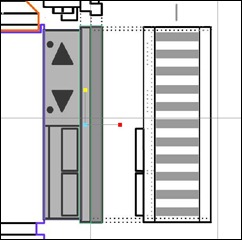
Create a cube and line it up with the control box as shown. *Note that I made it to fit the largest part. We will use this to line up the rest of the image planes.
Hide the Lightsaber, select the entire unit and then Display > Hide > Hide Selection. * To unhide Display > Show > Show Selection.
In the FRONT VIEW, create a cube scale and move it appropriately as shown below.
In the Side View, import the blueprint again.
In the side view under the Panel View Menu, go to View > Image Plane > Import Image browse and find the Light Saber blueprint again.
*Remember you are moving the image plane not the cube.
With the image plane still selected, we are going to move it from its default location (0, 0, 0). The first thing we are going to do is move the image plane back in the Center X direction. I use –20, this pushes the it back in the X direction and places it behind the grid and your workspace. Switch to the Channel Box – {Ctrl + a} this toggles between the attribute editor and the channel box. If you happen to deselect the image plane, you can bring back the attributes by choosing View > Image Plane > Image Plane Attributes > imagePlane2 (unless you renamed it).
The blueprint image was pre-centered horizontally, but we have to move it vertically in the Y direction again. Select the image plane attributes and then switch to the Channel Box, set Center Y to the same value as the front view 9.99 units. Yours might be different, the key is to zoom in really close.
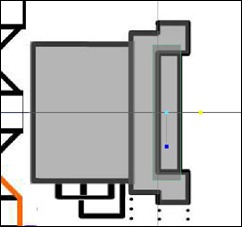
This time center the blueprint to the Activation Plate. I moved the image Center Z direction 4.195 units. See image. You can also see that I scaled the cube to line up with the width of the Activation Plate by scaling it in the Z-Direction.
We will now repeat this for the top view.
In the Top View, import the blueprint again.
In the top view under the Panel View Menu, go to View > Image Plane > Import Image browse and find the Light Saber blueprint again.
*Remember you are moving the image plane not the cube.
With the image plane still selected, we are going to move it until it lines up with the cube. The first thing we are going to do is move the image plane back in the Center Y direction. I use –20 , this pushes the it back in the Y-direction and places it behind the grid and your workspace. Switch to the Channel Box – {Ctrl + a} this toggles between the attribute editor and the channel box. If you happen to deselect the image plane, you can bring back the attributes by choosing View > Image Plane > Image Plane Attributes > imagePlane3 (unless you renamed it).
Move the image plane to line up exactly the way we did it with the front view. This time we are line it up with the cube we made. I moved the image Center Z-direction 0.205 units. Everything else seemed to line up. See image.
PART 2: Now that the image planes are all lined up, lets make it.
In the Top View, create a cube and place it as shown below.
in the Front View, scale it appropriately.
In the Top View, duplicate the last cube and scale it to fit image as shown below.
In the Top View on the last cube, insert 2 edge loops as shown below. Edit Mesh > Insert Edge Loop.
In the Top View, select the 2 top faces and extrude them out.
In the Top View, select the 2 top side faces and extrude them out.
In the Top View, scale to fit image as shown below.
Create a cube and line it up with the first ridge in the Side View.
In the Top View, scale the cube to fit the image. Then Bevel the edges of the cube. We will do this before we duplicate it. It is just easier that way.
We will repeat what we did earlier with the handle. Select the cube, duplicate it, move it to the second spot and then look in the Channel Box to find the distance it was displaced in the Y-Direction. Mine moved down –0.336, yours will be different, but close. Zoom in really close to make sure it was completely aligned. Then select the new piece and using the Duplicate Special change the following settings:
In my reference images there is a cover plate. Create a cube, place it and then Bevel it.
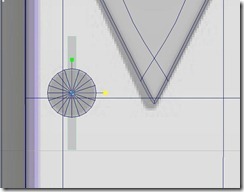
The last part are the screws. In the Front View, create a cylinder, scale, rotate and line it up with the image. Make sure you look in the Top View and line it up there as well.
In the Front View, create a cube, scale and position it as shown below.
In the Top View, scale and position the cube as shown below. Once that is done, apply a Boolean operation. Select the Cylinder then the Cube and the apply a Boolean difference. Mesh > Boolean > Difference This will subtract the cube from the cylinder.
Bevel all appropriate edges as shown below.
The Blade:
Make a cube and scale it to the size of the handle. Select the blade and freeze transformations. Modify > Freeze Transformations.
The blade is approximately 3 times the size of the handle, so we basically we just change Scale Y to 3 and then move the blade in place.
Insert edge loops at the top and bottom to control the roundness at the ends. I used 2 loop for the base and 1 for the top.
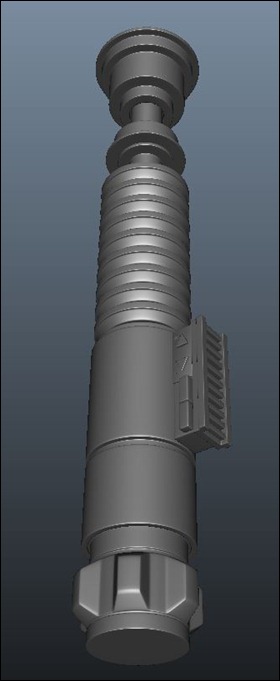
Now the model is done!!! We still have to render it.


















this is cool
ReplyDeletePancakes.
ReplyDeleteCIRCUS AFRO!
ReplyDeleteShneeShneeshnee.ShneeShneeshnee.ShneeShneeshnee.ShneeShneeshnee.ShneeShneeshnee.ShneeShneeshnee.ShneeShneeshnee.ShneeShneeshnee.ShneeShneeshnee.ShneeShneeshnee.ShneeShneeshnee.ShneeShneeshnee.ShneeShneeshnee.ShneeShneeshnee.ShneeShneeshnee.ShneeShneeshnee.ShneeShneeshnee.ShneeShneeshnee.ShneeShneeshnee.ShneeShneeshnee.ShneeShneeshnee.ShneeShneeshnee.ShneeShneeshnee.ShneeShneeshnee.ShneeShneeshnee.ShneeShneeshnee.ShneeShneeshnee.ShneeShneeshnee.ShneeShneeshnee.ShneeShneeshnee.ShneeShneeshnee.ShneeShneeshnee.ShneeShneeshnee.
ReplyDeleteso is this what you do with your life?
DeleteThangus Shneeson XVII here
ReplyDeleteThere's only enough room for one Thanguhs on this web page.
DeleteThis comment has been removed by the author.
ReplyDeleteThis comment has been removed by the author.
ReplyDelete